

Flashing AP55 and AP55C to give them a new life with OpenWRT
Requirements
- Sophos AP
- Multimeter
- USB To TTL adapter
- A computer with Tftpd64
Getting started
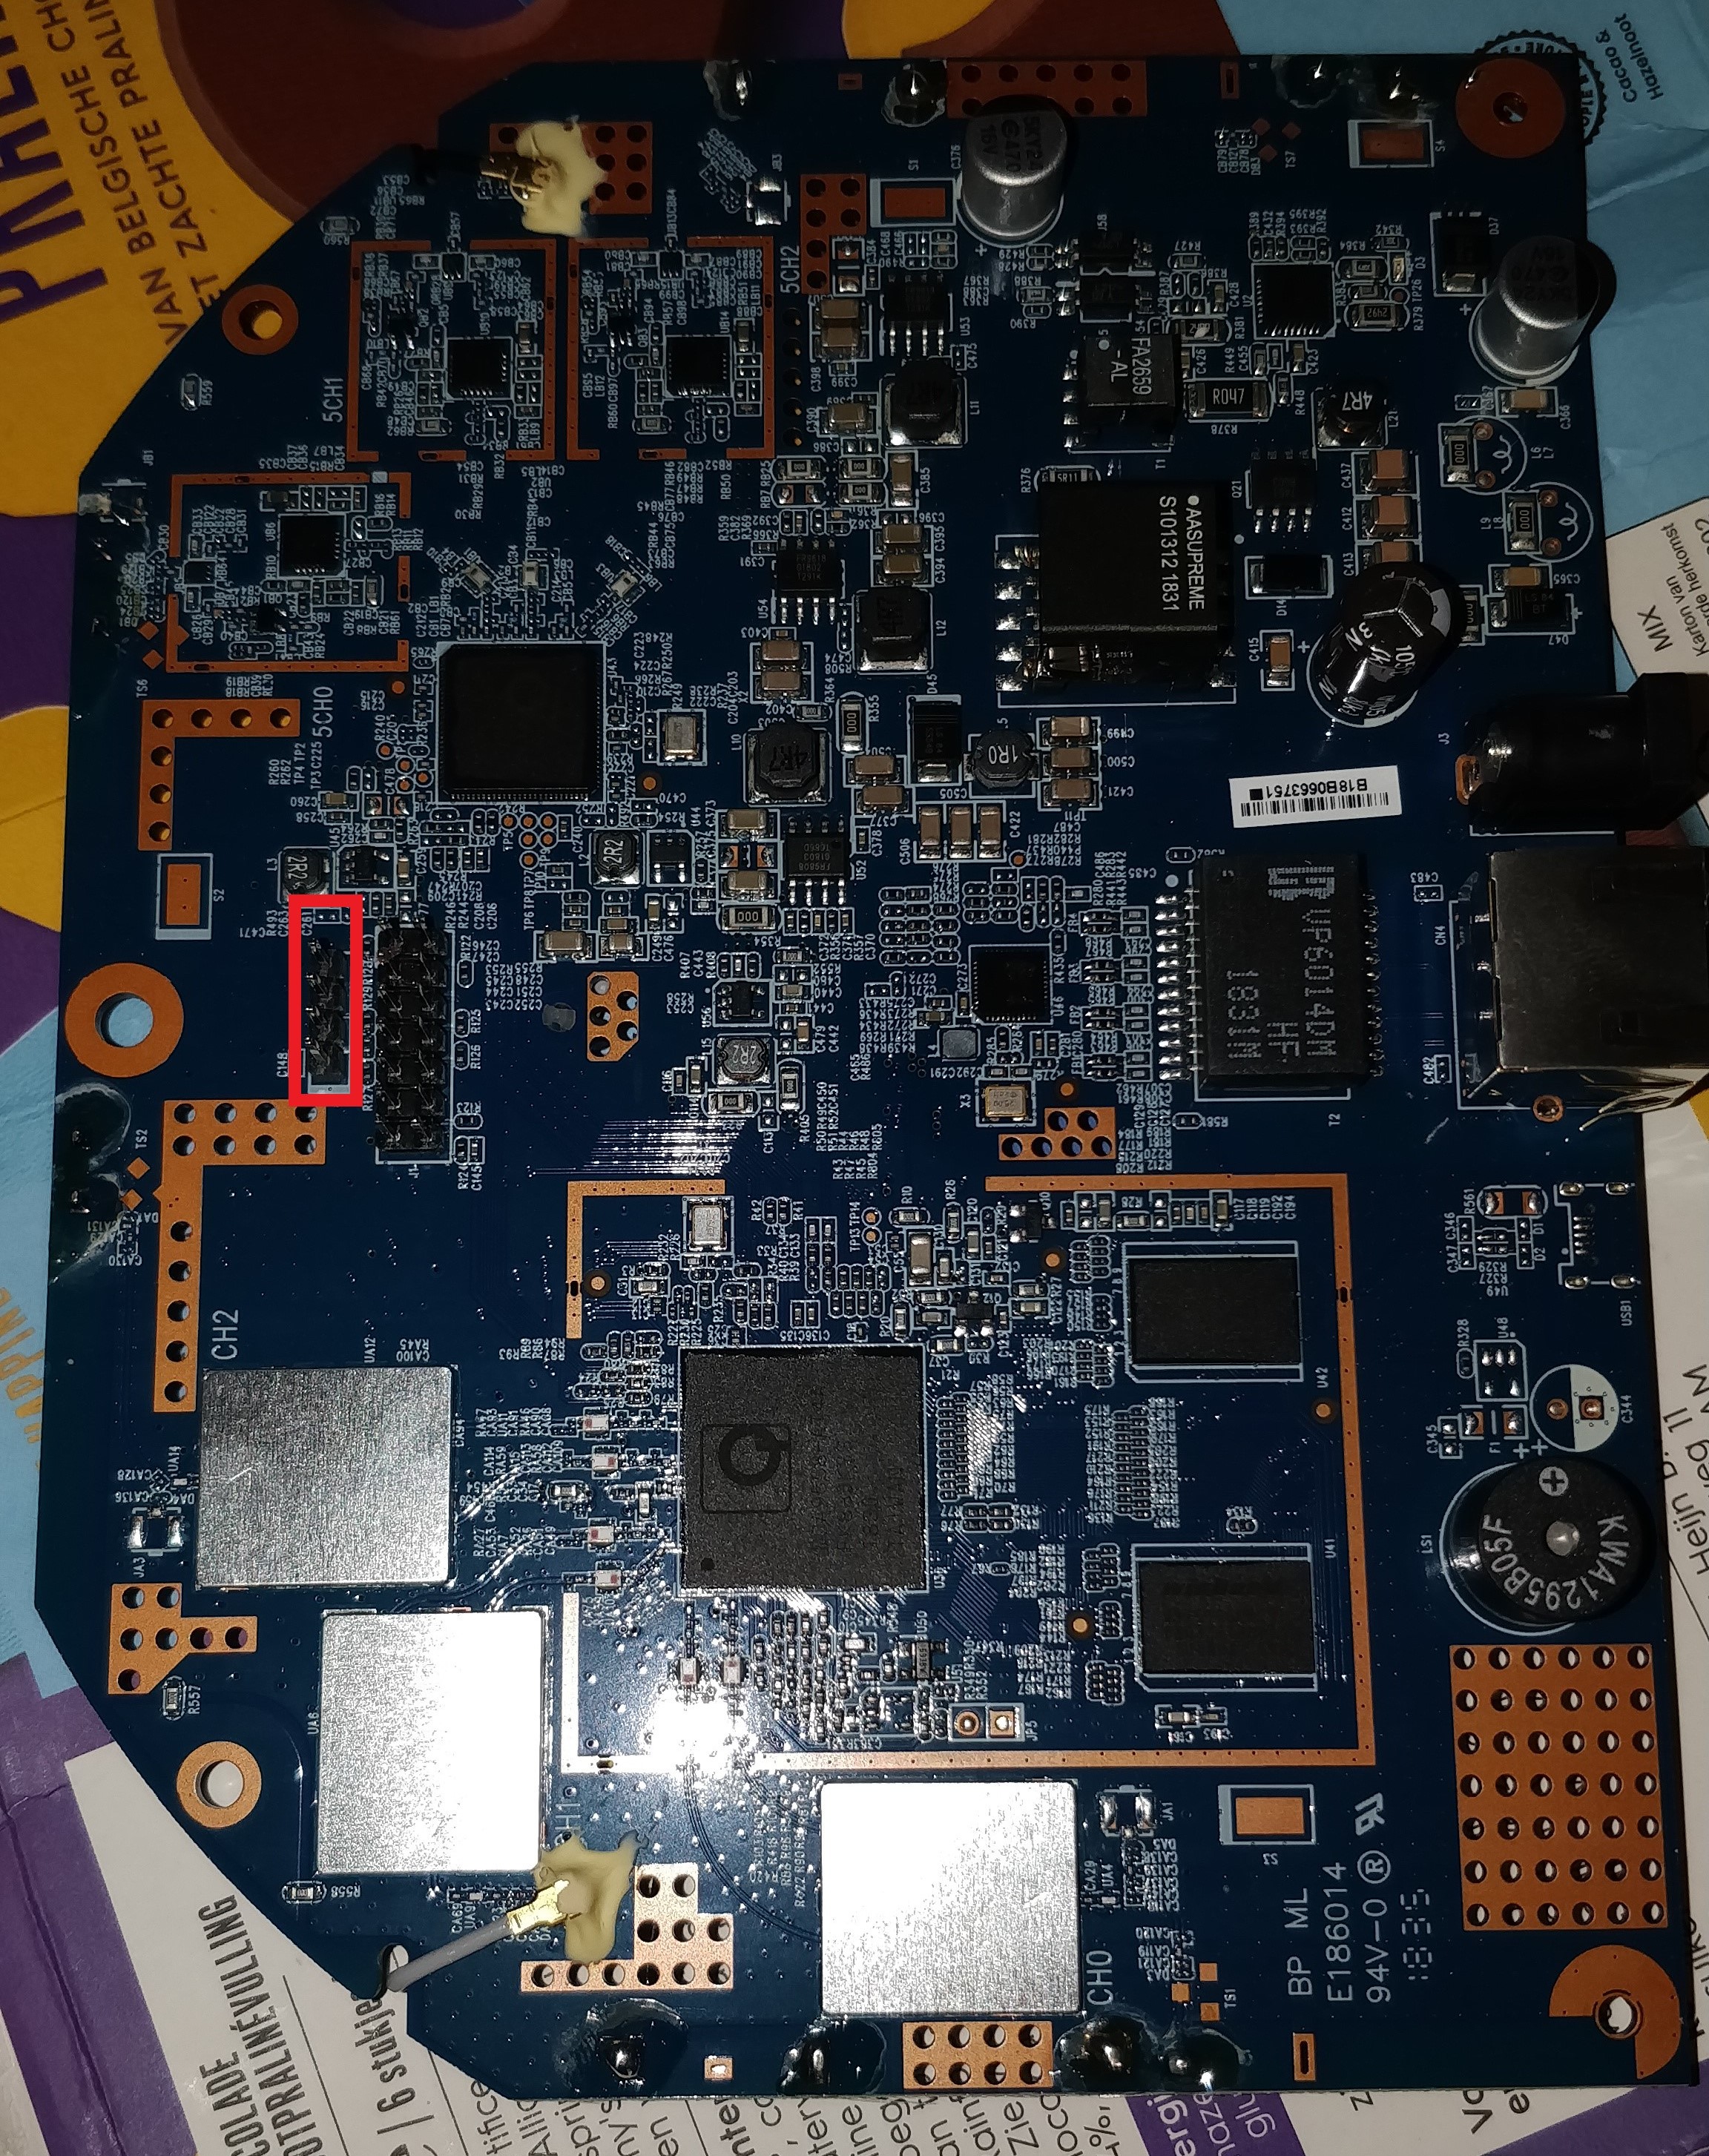
Open up your Access Point and locate the four TTL pins marked with the red square, you need the multimeter to indentify which pin is which. For this Board, the AP55C the order from left to right is like this. You should only connect the last three pins (2,3,4).
- 3.3v
- ground
- TX
- RX
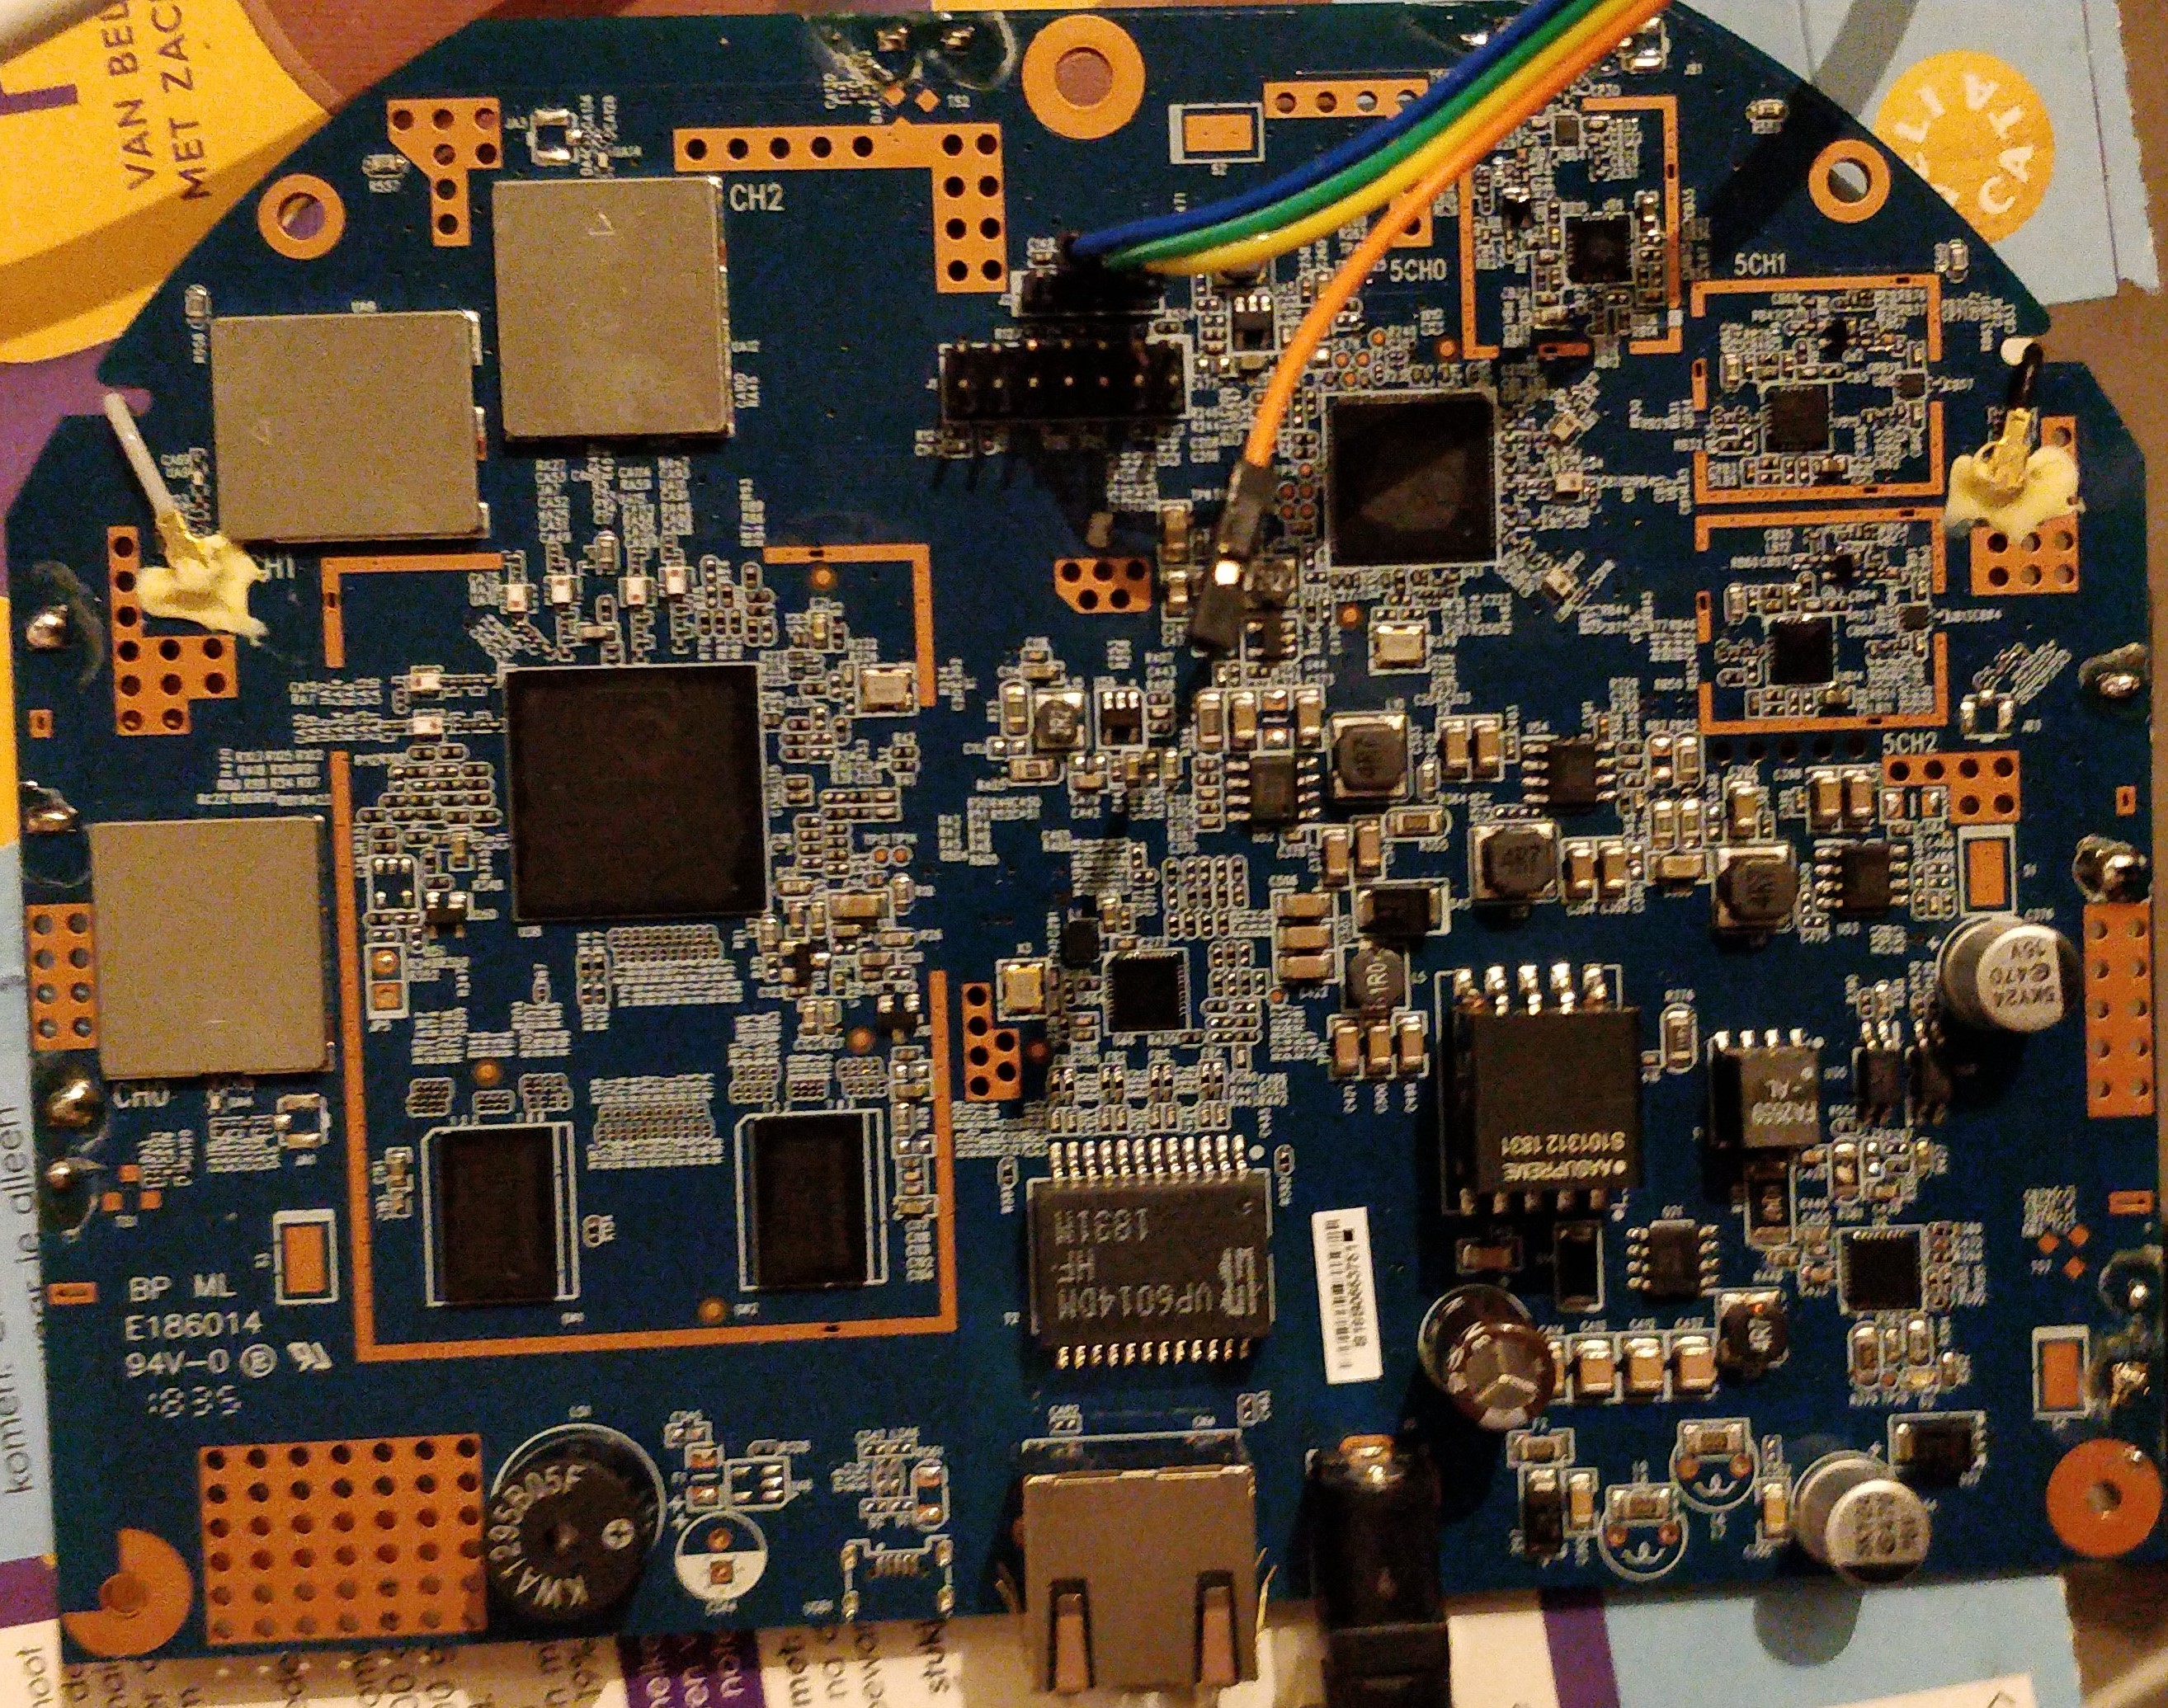
As an example I have connected the blue, green and yellow wire to the board.
- Blue: ground
- Green: TX on the board so RX on your USB
- Yellow: RX on the board so TX on your USB
Flashing the board
Now once you’re connected install the right drivers for the TTL USB, just have a look around the internet. Start your putty client, check which COM device has been assigned to the USB by windows and set the speed to 115200. After opening the session start the access point by plugging in the power cord and keep pressing a random keyboard key to interupt the boot sequence of U-BOOT.
On the Openwrt forum there is a link to images for the AP55 and AP100 series, download the correct image for your device via this url and download a squashfs-sysupgrade image. Start your TFTPD64 program, connect a ethernet cable from your device to the accesspoint and give your NIC 192.168.99.8/24 as IP and subnetmask. Set the TFTPD64 DHCP server with a pool starting at 192.168.99.9 so your AP is the 99.9.
Create a directory for your TFTP server and rename your openwrt image to “uImage_AP55”, then following this guide enter the following commands:
1
2
3
4
5
6
7
8
9
10
11
12
13
14
15
16
17
18
19
20
21
22
23
24
25
ath> tftpboot

Speed is 1000T

dup 1 speed 1000

Using eth0 device

TFTP from server 192.168.99.8; our IP address is 192.168.99.9

Filename 'uImage_AP55'.

Load address: 0x81000000

Loading: #################################################################

         #################################################################

         #################################################################

         ############################

done

Bytes transferred = 7132091 (6cd3bb hex)
Once your image has been uploaded the flash memory has to be erased and overwritten for the image to be bootable. In this case the Load address: 0x81000000 is the HEX address for the image. Do the following to see information about what to remove:
1
2
3
4
5
6
7
8
9
10
11
12
13
14
15
16
17
18
19
ath> bdinfo

boot_params = 0x87F7BFB0

memstart    = 0x80000000

memsize     = 0x08000000

flashstart  = 0x9F000000

flashsize   = 0x01000000

flashoffset = 0x00029CD4

ethaddr     = 00:00:AA:BB:CC:DD

ip_addr     = 192.168.99.9

baudrate    = 115200 bps
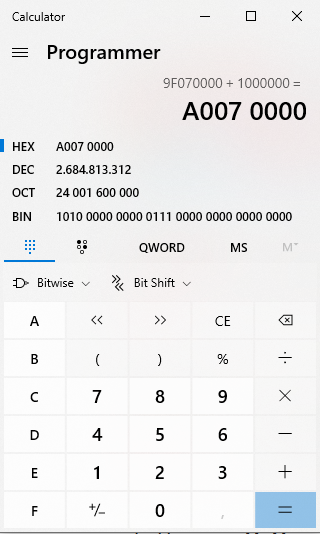
Now you can erase the space where the image boots from, which is in my case Booting image at 9f070000 meaning 0x9f070000. To calculate the end you have to use a hex calculator to add 0x9f070000 to the flashsize, which is 0x01000000. The result is 0xA0070000.
So you can erase the flash memory like this:
1
2
3
4
5
6
7
ath> era 0x9f070000 0xA0070000

Erasing flash...

First 0x7 last 0xff sector size 0x10000       255

Erased 249 sectors
Now we have to put the Openwrt image at the TFTP address in the space where U-BOOT wants to find the image. Which is 0x9F000000, we need the TFTP address which is 0x81000000 and we need the size Bytes transferred = 7132091 (6cd3bb hex).
So you can execute the following command with the above information:
1
2
3
4
5
6
7
ath> cp.b 0x81000000 0x9f070000 0x6cd3bb

Copy to Flash...

 Copy 7132091 [0x6cd3bb] byte to Flash... write addr: 9f070000

Done
It has been done, your OpenWrt image has been flashed onto the Sophos AP. You can now (re)boot the device with a simple boot command. Have fun!